ClickHouse Cluster on AWS
Partner Solution Deployment Guide

July 2023
Wei Qiao, AWS Great China Region Solution team; Luna Lu, AWS Great China Region Solutions Architect
Troy Ameigh, AWS Integration & Automation team

| Refer to the GitHub repository to view source files, report bugs, submit feature ideas, and post feedback about this Partner Solution. To comment on the documentation, refer to Feedback. |
This Partner Solution was created by AWS Great China Region Solution team in collaboration with Amazon Web Services (AWS). Partner Solutions are automated reference deployments that help people deploy popular technologies on AWS according to AWS best practices. If you’re unfamiliar with AWS Partner Solutions, refer to the AWS Partner Solution General Information Guide.
Overview
This Quick Start guide provides instructions for deploying a ClickHouse cluster on the AWS Cloud. ClickHouse is an open-source, column-oriented database management system (DBMS), which can be used for online analytical processing of queries (OLAP).
This deployment is for customers who want to process analytical queries using a DBMS, such as MySQL, PostgreSQL, and Oracle Database. During the deployment, customers can configure the AWS CloudFormation templates to define the desired cluster nodes and settings.
Costs and licenses
There is no cost to use this Partner Solution, but you will be billed for any AWS services or resources that this Partner Solution deploys. For more information, refer to the AWS Partner Solution General Information Guide.
Architecture
Deploying this Quick Start for a new virtual private cloud (VPC) with default parameters builds the following ClickHouse environment in the AWS Cloud.
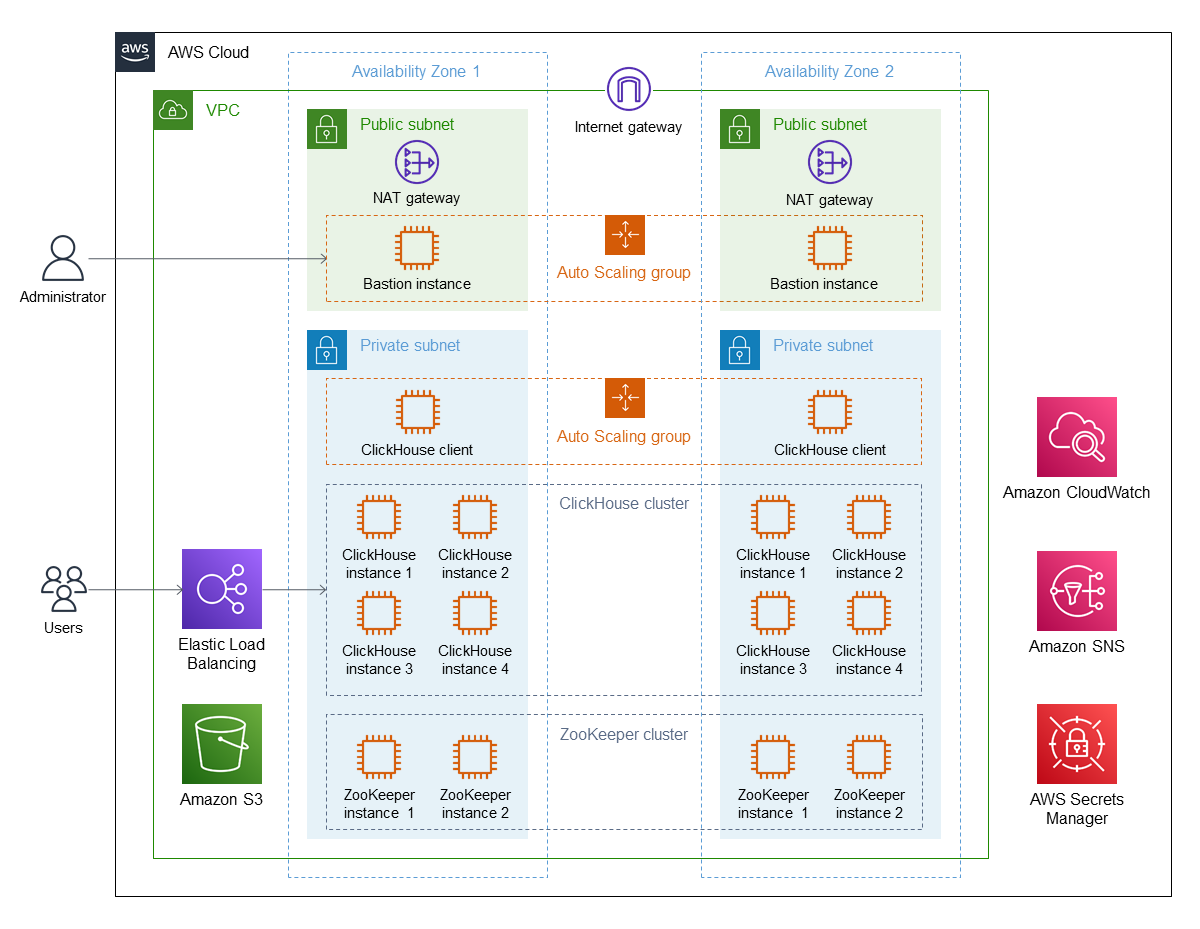
As shown in Figure 1, the Quick Start sets up the following:
-
A highly available architecture that spans two Availability Zones.*
-
A VPC configured with public and private subnets, according to AWS best practices, to provide you with your own virtual network on AWS.*
-
An internet gateway to allow internet access for bastion hosts.*
-
-
In the public subnets:
-
Managed network address translation (NAT) gateways to allow outbound internet access for resources in the private subnets.*
-
A Linux bastion host in an Auto Scaling group to allow inbound Secure Shell (SSH) access to Amazon EC2 instances in public and private subnets.*
-
-
In the private subnets:
-
A ClickHouse client in an Auto Scaling group to allow administrators to connect to the ClickHouse cluster.
-
A ClickHouse database cluster that contains Amazon EC2 instances.
-
A ZooKeeper cluster that contains Amazon EC2 instances for storing metadata for ClickHouse replication. Each replica stores its state in ZooKeeper as the set of parts and its checksums. The default is three.
-
-
Elastic Load Balancing for the ClickHouse cluster.
-
An Amazon S3 bucket for tiered storage of the ClickHouse cluster.
-
Amazon CloudWatch Logs to centralize ClickHouse logs and modify the log-retention policy.
-
Amazon Simple Notification Service (Amazon SNS) for sending email notifications when an alarm triggers.
-
AWS Secrets Manager to store dynamically generated passwords.
* The template that deploys the Quick Start into an existing VPC skips the components marked by asterisks and prompts you for your existing VPC configuration.
Deployment options
This Partner Solution provides the following deployment options:
-
Deploy ClickHouse into a new VPC. This option builds a new AWS environment that consists of the VPC, subnets, NAT gateways, security groups, bastion hosts, and other infrastructure components. It then deploys ClickHouse into this new VPC.
-
Deploy ClickHouse into an existing VPC. This option provisions ClickHouse in your existing AWS infrastructure.
This Partner Solution provides separate templates for these options. It also lets you configure Classless Inter-Domain Routing (CIDR) blocks, instance types, and ClickHouse settings.
Predeployment steps
This solution can be deployed in both AWS global regions and AWS China regions.
-
For deployment in global regions: You can leave the
ClickHousePkgS3URIparameter in the template as the default value none and skip this section. -
For deployment in China regions: Please follow the steps below to upload pre-compiled ClickHouse tgz archives to your own S3 bucket and update the
ClickHousePkgS3URIparameter.
AWS China region pre-deployment steps
-
Download pre-complied tgz archives from https://packages.clickhouse.com/tgz/lts/ to your local.
-
ClickHouse 23.3.8.21 on X86:
wget https://packages.clickhouse.com/tgz/lts/clickhouse-server-23.3.8.21-amd64.tgz wget https://packages.clickhouse.com/tgz/lts/clickhouse-common-static-23.3.8.21-amd64.tgz wget https://packages.clickhouse.com/tgz/lts/clickhouse-client-23.3.8.21-amd64.tgz -
ClickHouse 23.3.8.21 on ARM:
wget https://packages.clickhouse.com/tgz/lts/clickhouse-server-23.3.8.21-arm64.tgz
wget https://packages.clickhouse.com/tgz/lts/clickhouse-common-static-23.3.8.21-arm64.tgz
wget https://packages.clickhouse.com/tgz/lts/clickhouse-client-23.3.8.21-arm64.tgz
-
-
Create a S3 bucket in your AWS China account and upload the tgz archives to the bucket.
-
Make sure the bucket is in the same region as the AWS account in which you are deploying this ClickHouse solution.
-
Please upload the tgz archives directly to the bucket. Do not put them in a folder.
-
The bucket containing ARM versions must only contain ARM versions.
-
The bucket containing X86 versions must only contain X86 versions.
-
-
Note down your S3 bucket URI, e.g.,
s3://{YOUR_BUCKET}. Update theClickHousePkgS3URIparameter with your bucket URI when configuring stack details.
Deployment steps
-
Sign in to your AWS account, and launch this Partner Solution, as described under Deployment options. The AWS CloudFormation console opens with a prepopulated template.
-
Choose the correct AWS Region, and then choose Next.
-
On the Create stack page, keep the default setting for the template URL, and then choose Next.
-
On the Specify stack details page, change the stack name if needed. Review the parameters for the template. Provide values for the parameters that require input. For all other parameters, review the default settings and customize them as necessary. When you finish reviewing and customizing the parameters, choose Next.
Unless you’re customizing the Partner Solution templates or are instructed otherwise in this guide’s Predeployment section, don’t change the default settings for the following parameters: QSS3BucketName,QSS3BucketRegion, andQSS3KeyPrefix. Changing the values of these parameters will modify code references that point to the Amazon Simple Storage Service (Amazon S3) bucket name and key prefix. For more information, refer to the AWS Partner Solutions Contributor’s Guide. -
On the Configure stack options page, you can specify tags (key-value pairs) for resources in your stack and set advanced options. When you finish, choose Next.
-
On the Review page, review and confirm the template settings. Under Capabilities, select all of the check boxes to acknowledge that the template creates AWS Identity and Access Management (IAM) resources that might require the ability to automatically expand macros.
-
Choose Create stack. The stack takes about 60 minutes to deploy.
-
Monitor the stack’s status, and when the status is CREATE_COMPLETE, the ClickHouse Cluster deployment is ready.
-
To view the created resources, choose the Outputs tab.
Postdeployment steps
Log in to a ClickHouse server node
-
Locate your private key, which is used to launch
clickhouse.pem. Run the following command to ensure your key is not publicly viewable:
chmod 400 ./clickhouse.pem-
Upload the PEM key pair to the bastion host:
scp -i "clickhouse.pem" ./clickhouse.pem ec2-user@ec2-11-11-11-11.compute-1.amazonaws.com:/home/ec2-user-
Sign in to the bastion host:
ssh -i "clickhouse.pem" ec2-user@ec2-11-11-11-11.compute-1.amazonaws.com-
Obtain the IP address from the Amazon EC2 console.
-
Navigate to the Amazon EC2 console.
-
On the Instances page, select the check box for your instance. In the Description tab, note the Private IPs, as shown in Figure 2.
-

-
From the bastion host, ensure that the PEM key pair file is in the bastion host directory, and then log in to the client node:
(ec2-user@ip-11-11-11-11) $ ssh -i "clickhouse.pem" ec2-user@ec2-22-22-22-22.compute-1.amazonaws.com __| __|_ ) _| ( / Amazon Linux 2 AMI ___|\___|___| https://aws.amazon.com/amazon-linux-2/ No packages needed for security; 2 packages available Run "sudo yum update" to apply all updates. [ec2-user@ip-22-22-22-22 ~]$ -
To query, manage, and diagnose issues, use the ClickHouse command line client.
Grafana web console
By default, the deployment installs the Grafana web console on the ClickHouse client host in the private subnets. The subnets cannot be accessed directly through a browser. To access port 3000 of the private IP address of the Grafana server, configure an SSH (Secure Shell) connection using the tunnel of the bastion host. Then use the SSH tunnel to access the web console.
-
Connect to the bastion host using SSH. Replace
port number,key pair.pem,user name, andhost namewith your parameters:ssh -qTfnN -D port number -i "key pair.pem" user name@host nameFor example:
ssh -qTfnN -D 40011 -i "clickhouse.pem" ec2-user@ec2-54-223-36-247.cn-north-1.compute.amazonaws.com.cn -
Set up a proxy manager, such as Proxy SwitchyOmega, in your browser. There are many proxy manager plugins available. The following example uses Proxy SwitchyOmega.
-
[Install Proxy SwitchyOmega for Google Chrome]
-
Open the SwitchyOmega Options page, and choose New Profile in the left sidebar.
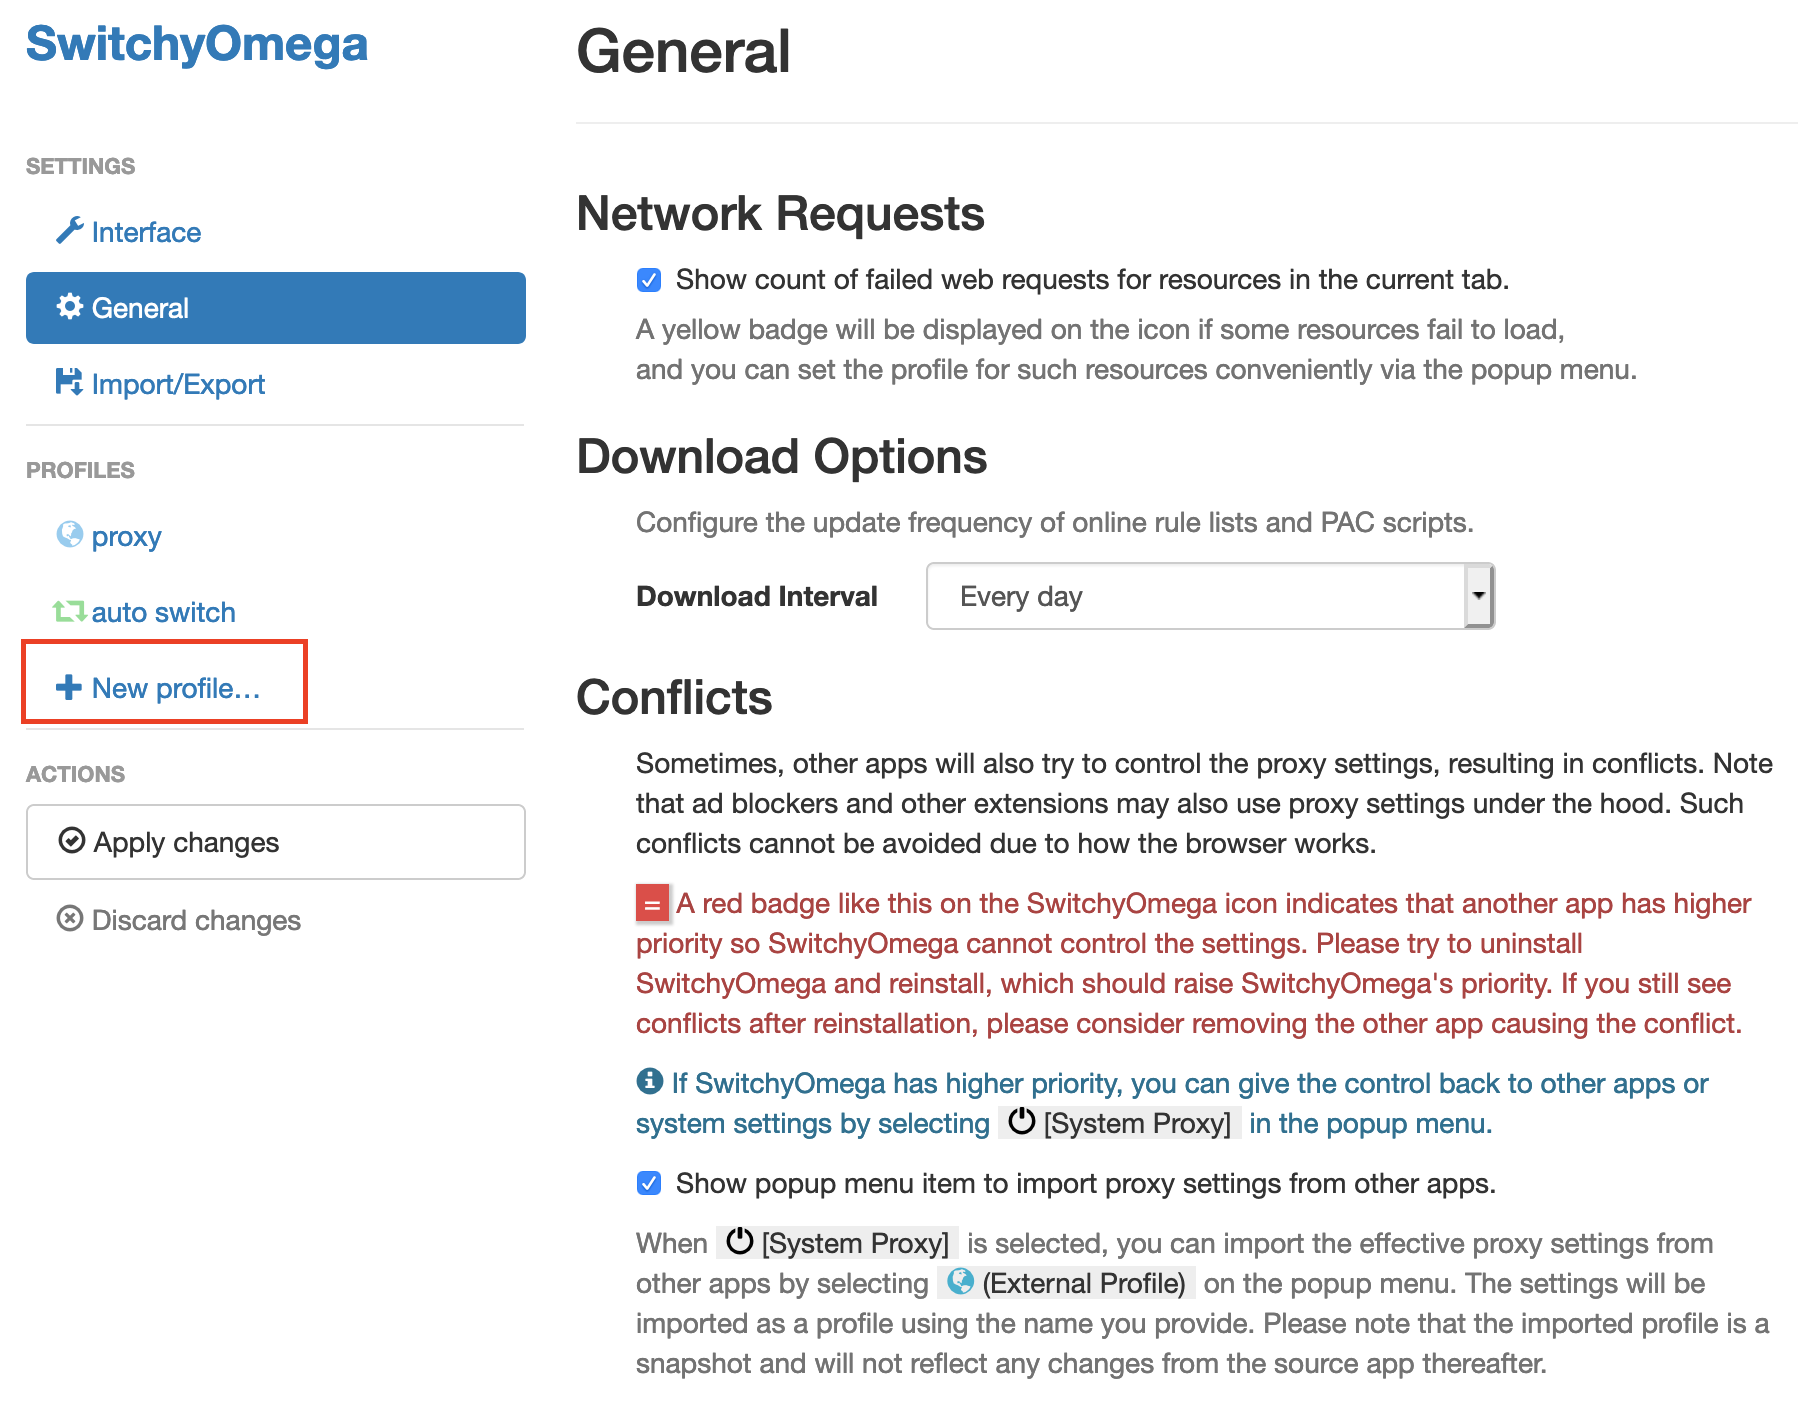 Figure 3. Add a new SwitchyOmega profile.
 -
Enter a name, and choose Create.
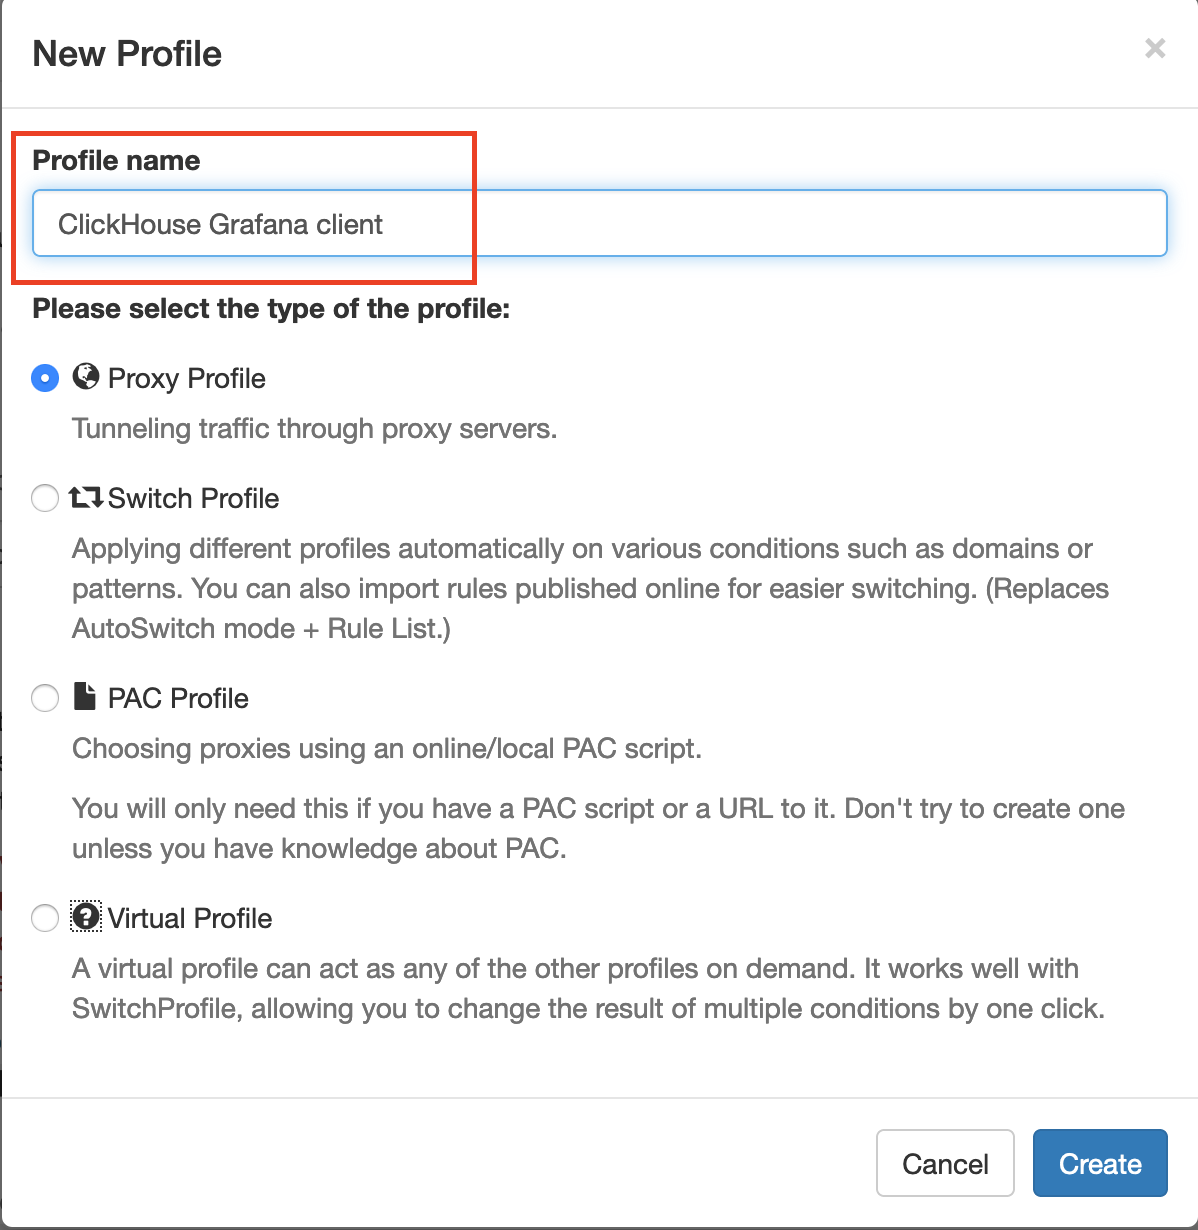 Figure 4. Profile name
 -
Provide the protocol, server, and port for the proxy server. The port is the local port where you set up the SSH tunnel.
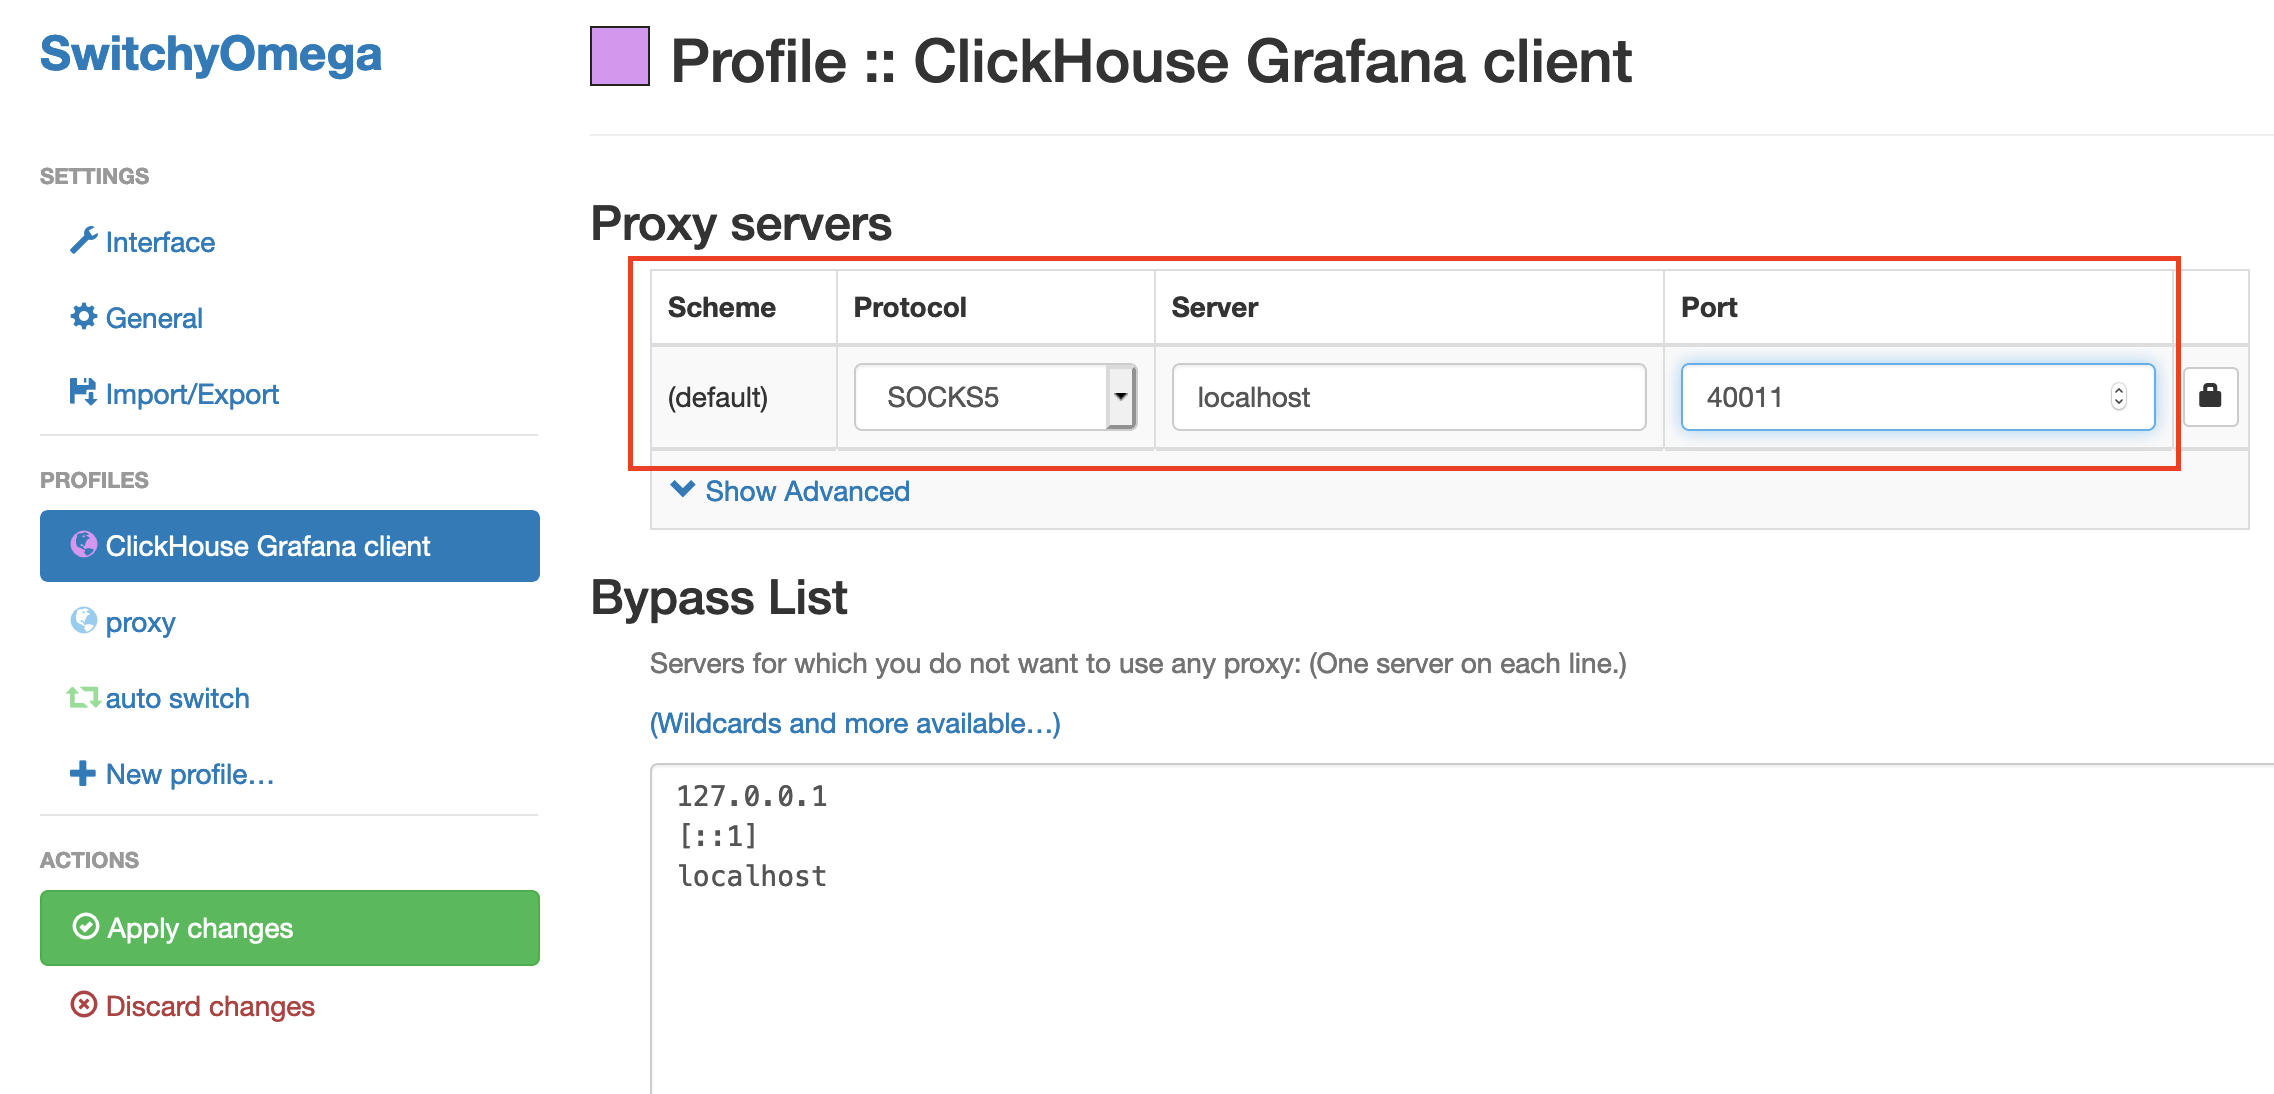 Figure 5. Proxy servers.
 -
Choose Apply Changes.
-
Access SwitchyOmega through the extension in your browser. Choose your created profile in the proxy list. The browser sends all traffic through port
40011to the bastion host.
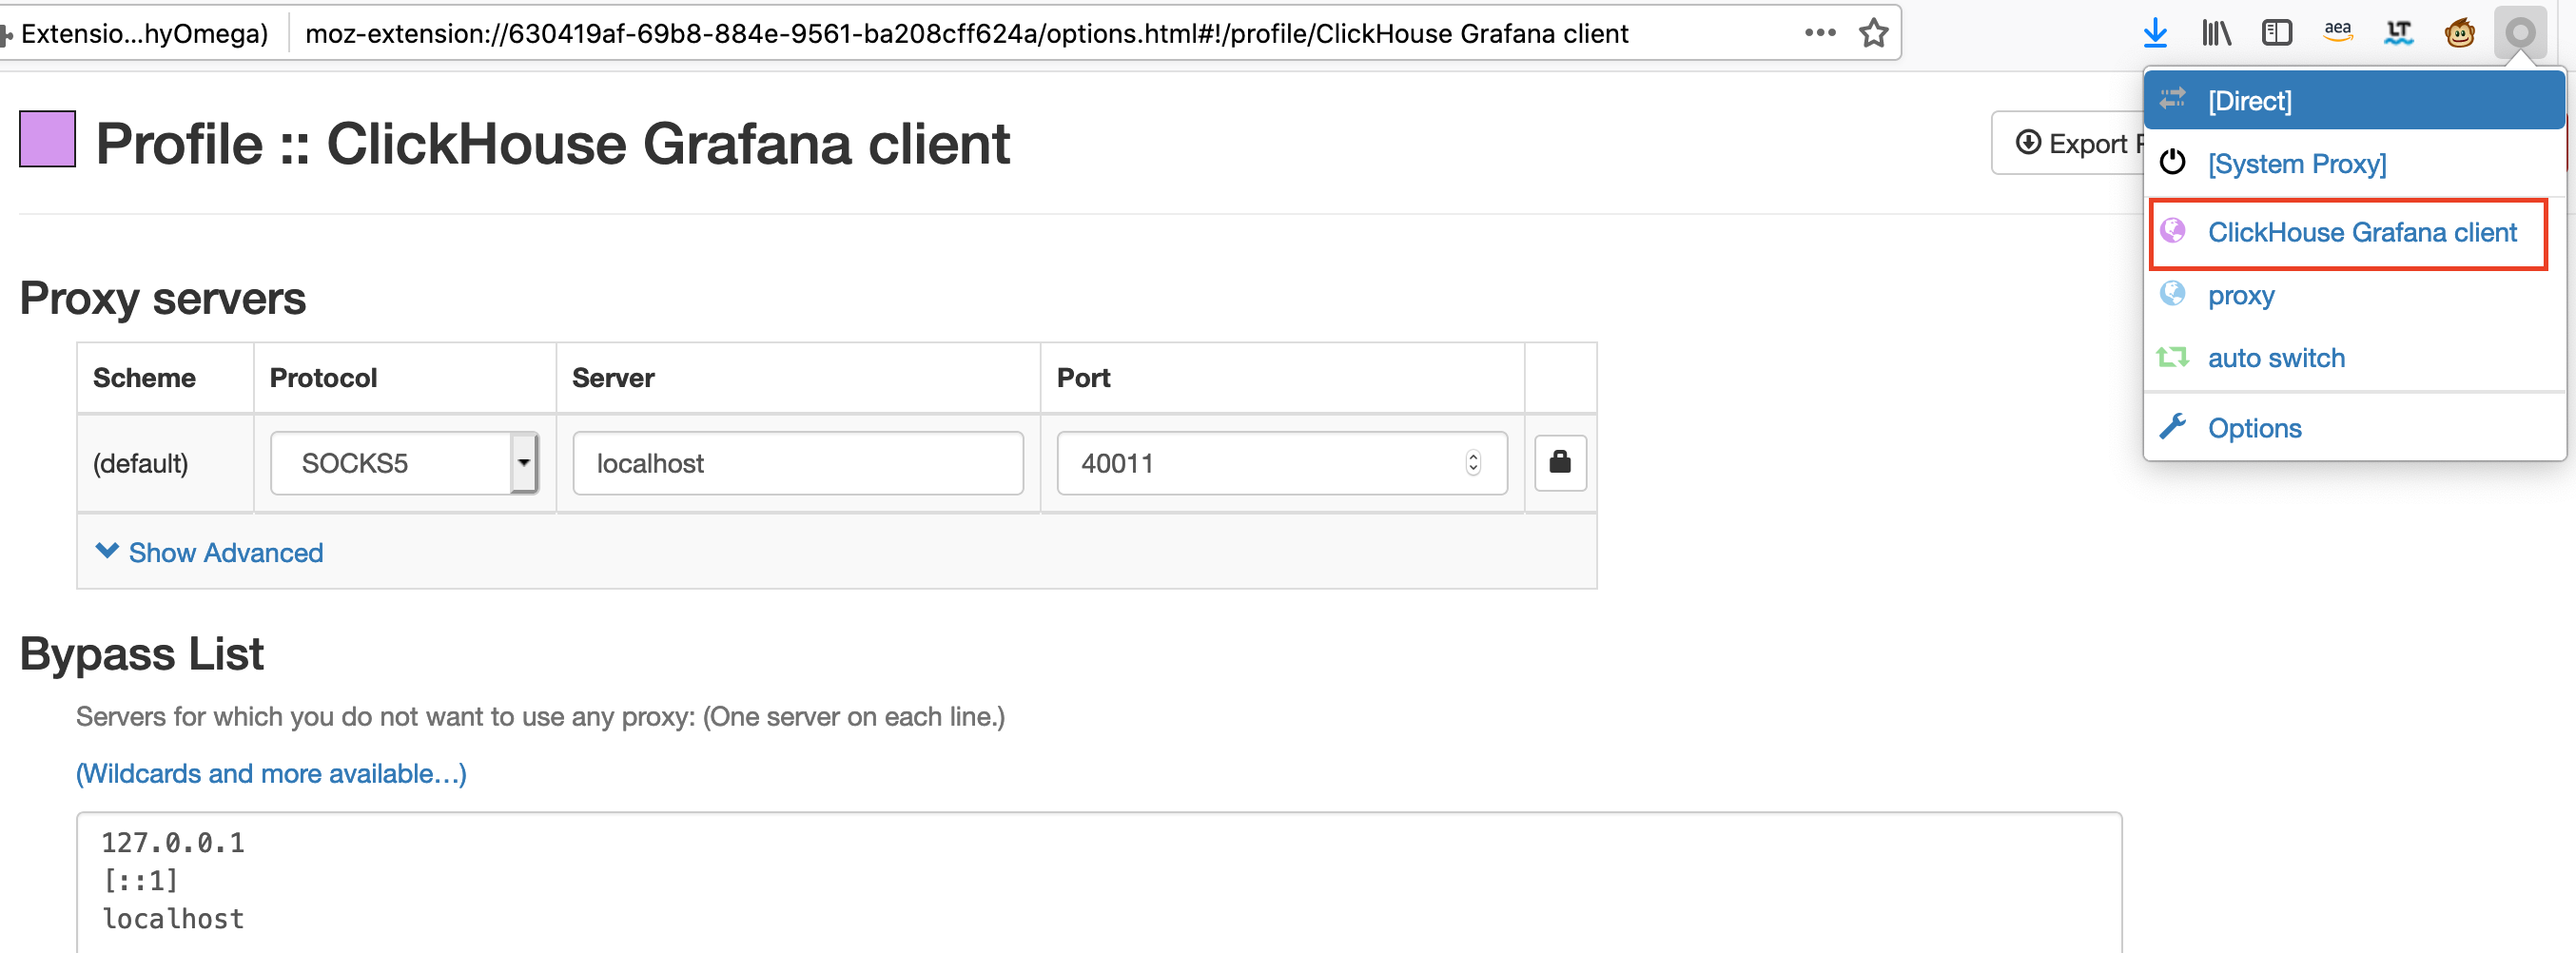 Figure 6. Proxy list.
 -
-
To view the Grafana web console on the ClickHouse client host, navigate to
http://10.0.xx.xx:3000(replacexx.xxwith the private IP address of the client host). You can find the private IP address of the server namedClickHouseAdminClientin the Amazon EC2 console.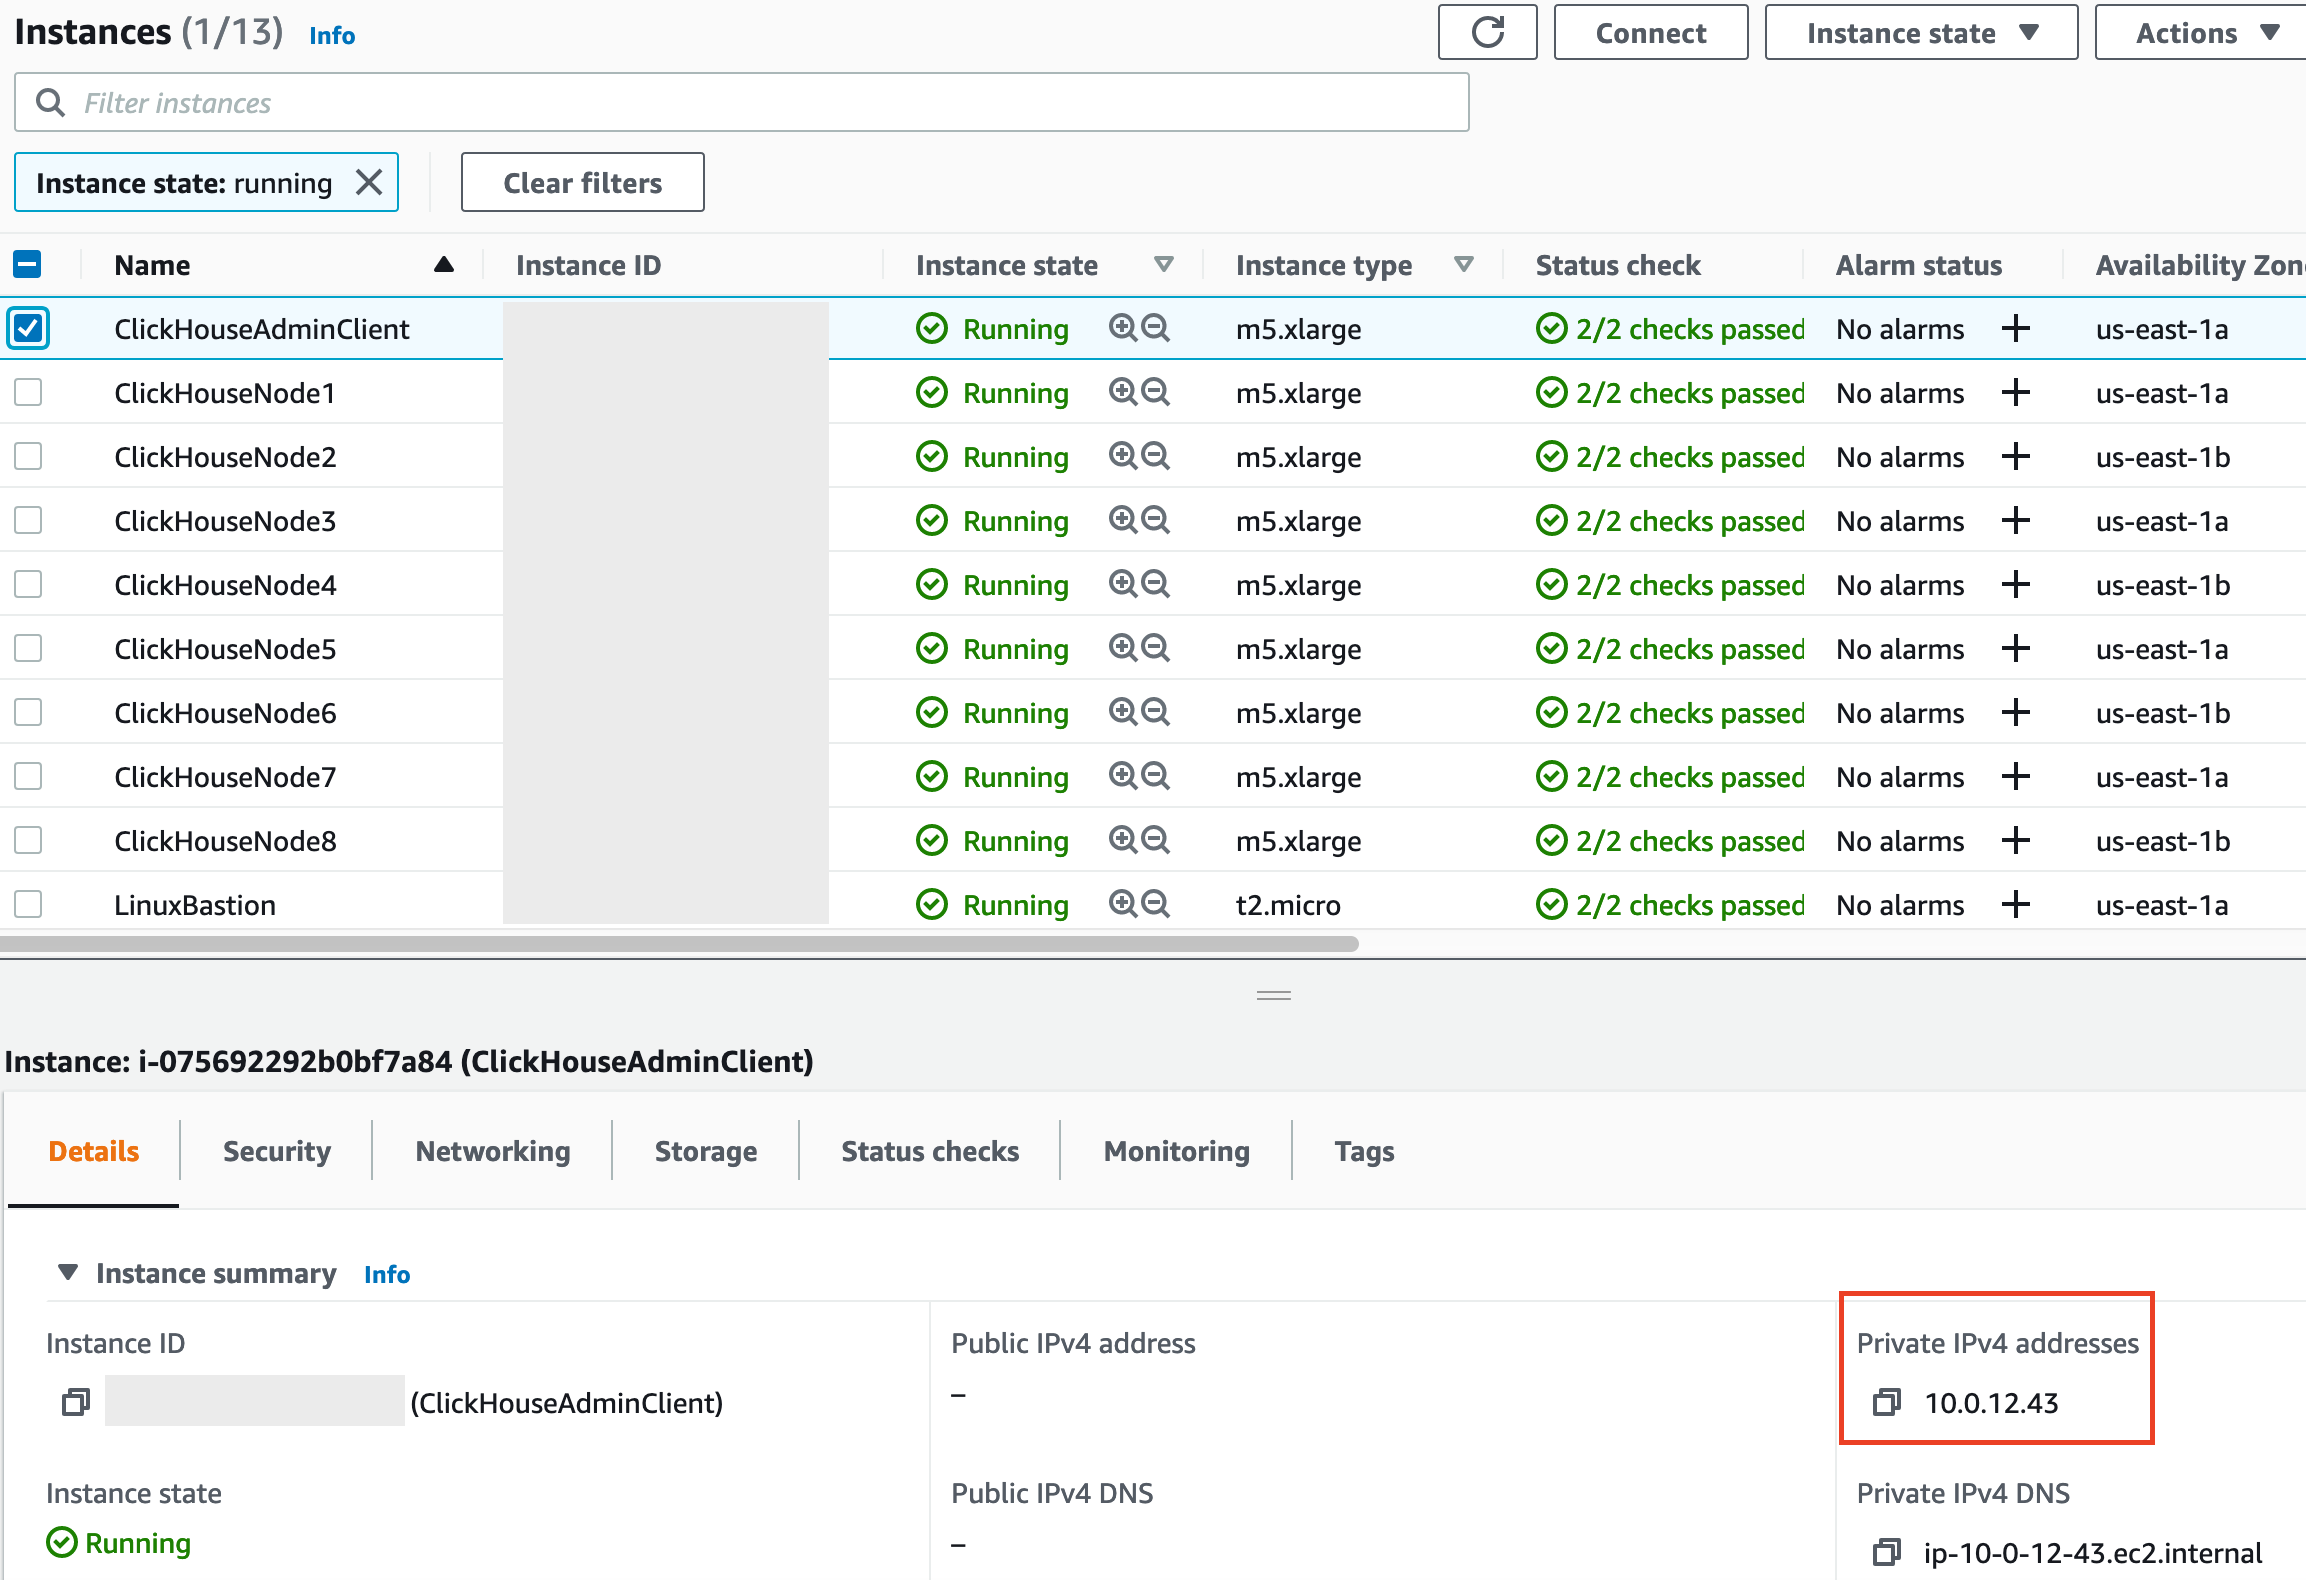 Figure 7. Private IP address of the ClickHouse client host in the Amazon EC2 console.
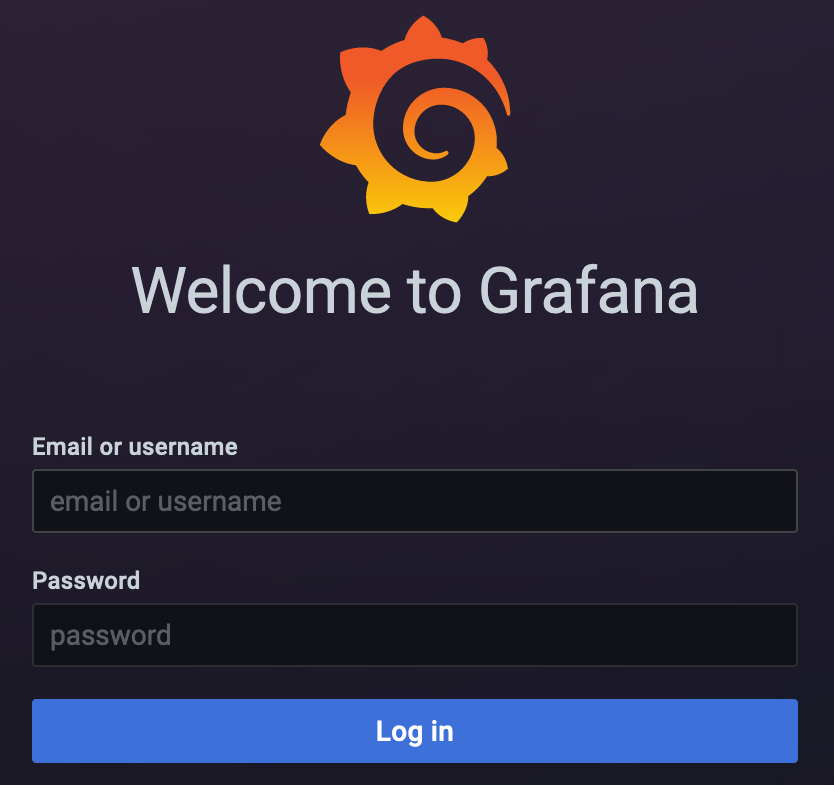 Figure 8. Grafana web console


-
The user name is
admin. To retrieve the password for the Grafana web console, navigate to the AWS CloudFormation console, choose Outputs, and search for theDBPasswordparameter.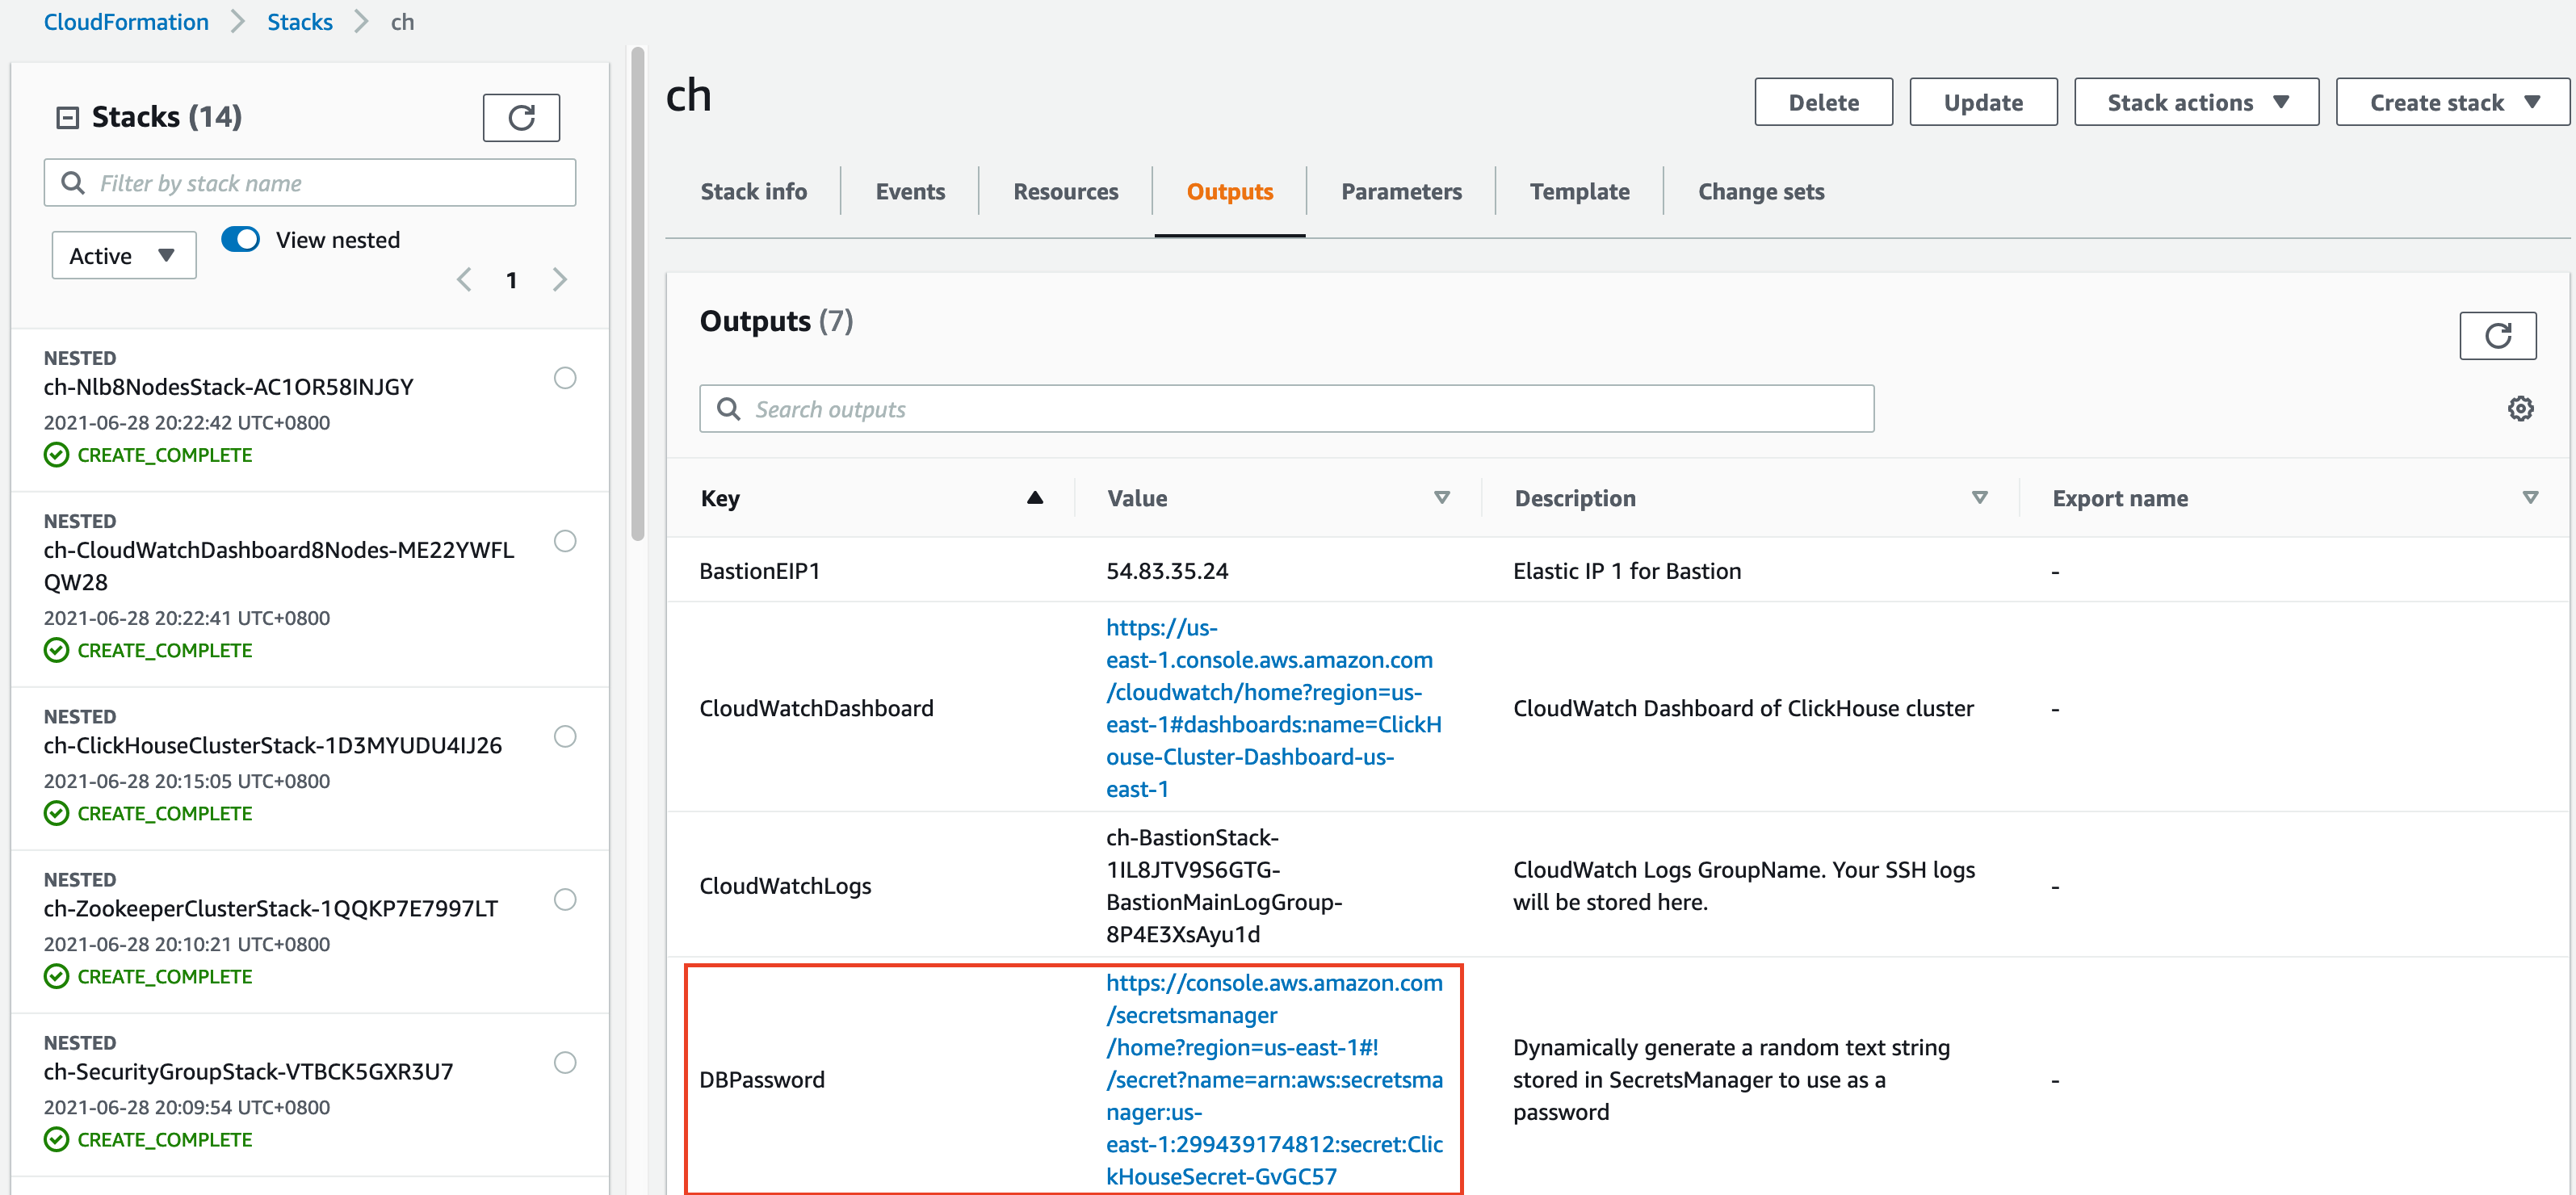 Figure 9. AWS CloudFormation outputs

-
To find the password, navigate to the AWS Secrets Manager console, and choose Retrieve secret value.
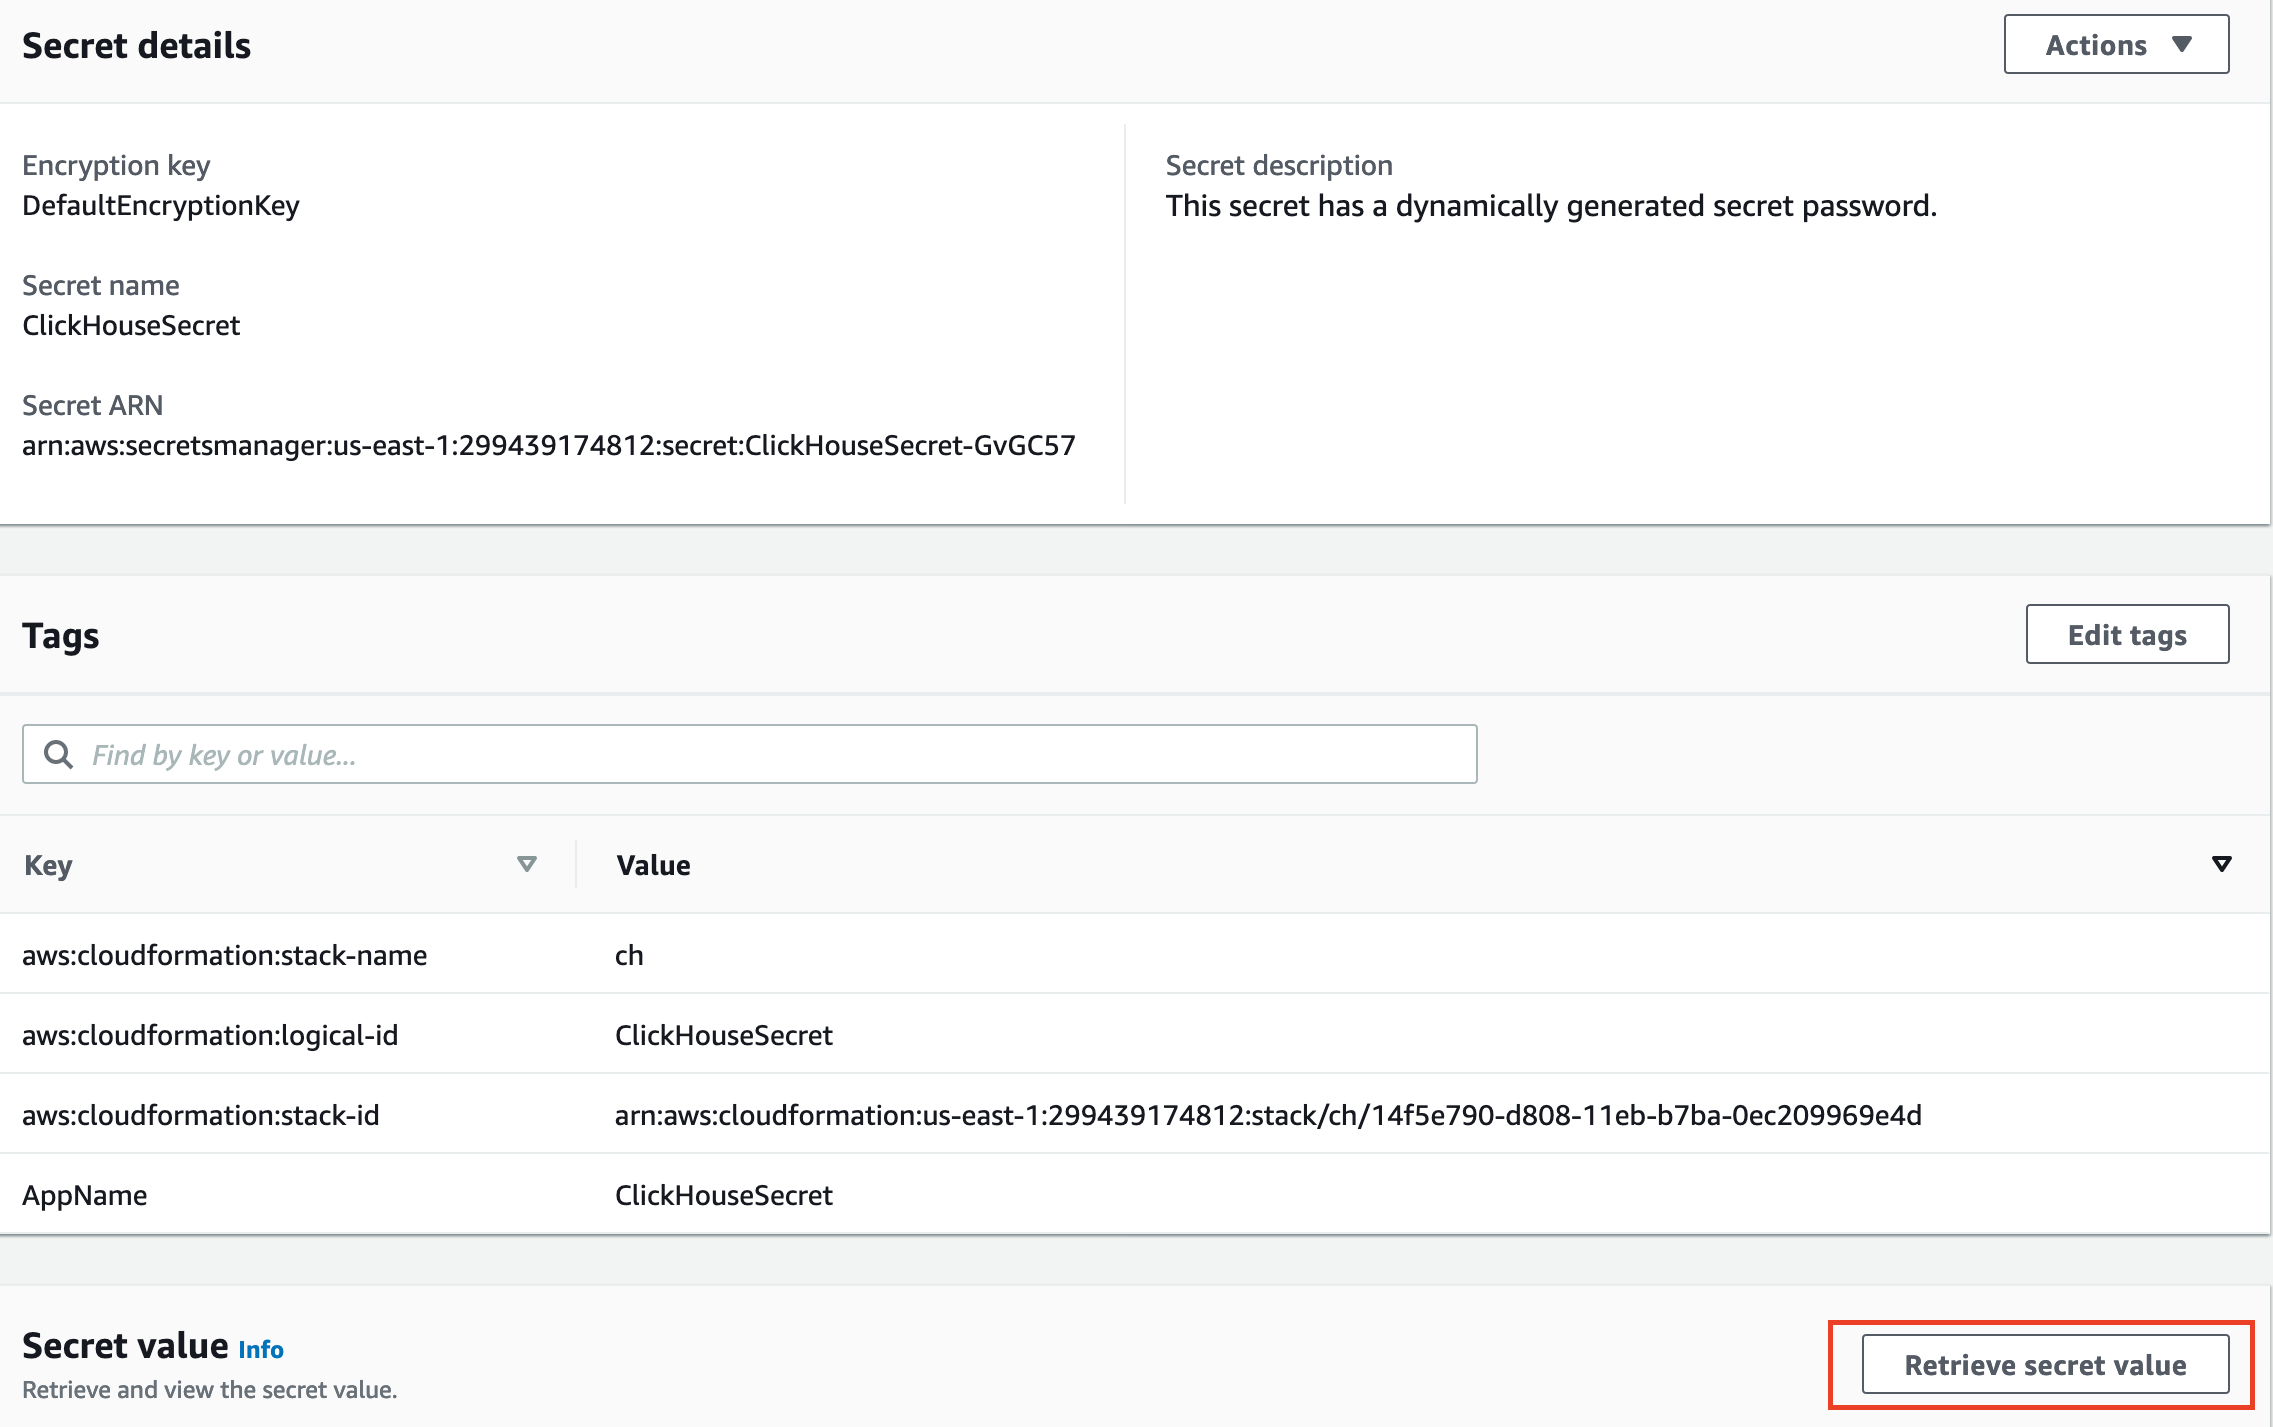 Figure 10. AWS Secrets Manager console

Troubleshooting
For troubleshooting common Partner Solution issues, refer to the AWS Partner Solution General Information Guide and Troubleshooting CloudFormation.
Additional Info
-
Deployment script installation log to troubleshoot error messages:
/home/ec2-user/clickhouse-client-install.log -
Grafana web console:
/etc/grafana
ClickHouse server nodes
-
ClickHouse server installation directory:
/etc/clickhouse-server -
ClickHouse server data directory in local file storage:
/home/clickhouse/data -
ClickHouse server data directory in S3 bucket:
clickhouse-data-vpcid -
Deployment script installation log to troubleshoot error messages:
/home/ec2-user/ch-install.log
ClickHouse client nodes
-
ClickHouse client installation directory:
/etc/clickhouse-client -
Deployment script installation log to troubleshoot error messages:
/home/ec2-user/clickhouse-client-install.log -
Grafana web console:
/etc/grafana
ZooKeeper server nodes
-
Apache ZooKeeper installation directory:
/usr/local/apache-zookeeper-3.5.9-bin/ -
Deployment script installation logs:
/home/ec2-user/zk.log
ClickHouse resources
Customer responsibility
After you deploy a Partner Solution, confirm that your resources and services are updated and configured—including any required patches—to meet your security and other needs. For more information, refer to the Shared Responsibility Model.
Feedback
To submit feature ideas and report bugs, use the Issues section of the GitHub repository for this Partner Solution. To submit code, refer to the Partner Solution Contributor’s Guide. To submit feedback on this deployment guide, use the following GitHub links:
Notices
This document is provided for informational purposes only. It represents current AWS product offerings and practices as of the date of issue of this document, which are subject to change without notice. Customers are responsible for making their own independent assessment of the information in this document and any use of AWS products or services, each of which is provided "as is" without warranty of any kind, whether expressed or implied. This document does not create any warranties, representations, contractual commitments, conditions, or assurances from AWS, its affiliates, suppliers, or licensors. The responsibilities and liabilities of AWS to its customers are controlled by AWS agreements, and this document is not part of, nor does it modify, any agreement between AWS and its customers.
The software included with this paper is licensed under the Apache License, version 2.0 (the "License"). You may not use this file except in compliance with the License. A copy of the License is located at https://aws.amazon.com/apache2.0/ or in the accompanying "license" file. This code is distributed on an "as is" basis, without warranties or conditions of any kind, either expressed or implied. Refer to the License for specific language governing permissions and limitations.